Congratulations on choosing IsoBox. This tutorial demonstrates how to activate a license by product key*.
*There’s no need to activate licenses supplied by USB dongles. If you are using USB dongles, simply plug in the dongle before launching IsoBox and skip this tutorial.
About This Tutorial
The tutorial contains the sections described below.
- ‘Prerequisites‘: describes the requirements before activating a license.
- ‘Part 1: Online Activation‘: describes how to activate a license by the Online Activation option for a target machine with internet connection.
- ‘Part 2: Offline Activation‘: describes how to activate a license by the Offline Activation option for a target machine without internet connection, or when the Online Activation fails.
- ‘Part 3: Verification of Activated Licenses‘: describes how to verify the licenses are installed successfully.
Prerequisites
Before activating a license, please install a valid copy of IsoBox on the target machine. The activation process requires the Sentinel Runtime, which is installed as part of IsoBox.
Part 1: Online Activation
In most cases, online activation is the most convenient way to activate a license by a product key. The license server will communicate with the Sentinel Runtime on the target machine, and the activation is performed automatically with one-click.
1. Chrome and Firefox browsers are tested and confirmed to be compatible with the online activation service. Please use either of those in the following steps.
2. Visit ChemGeo’s EMS Customer Portal at:
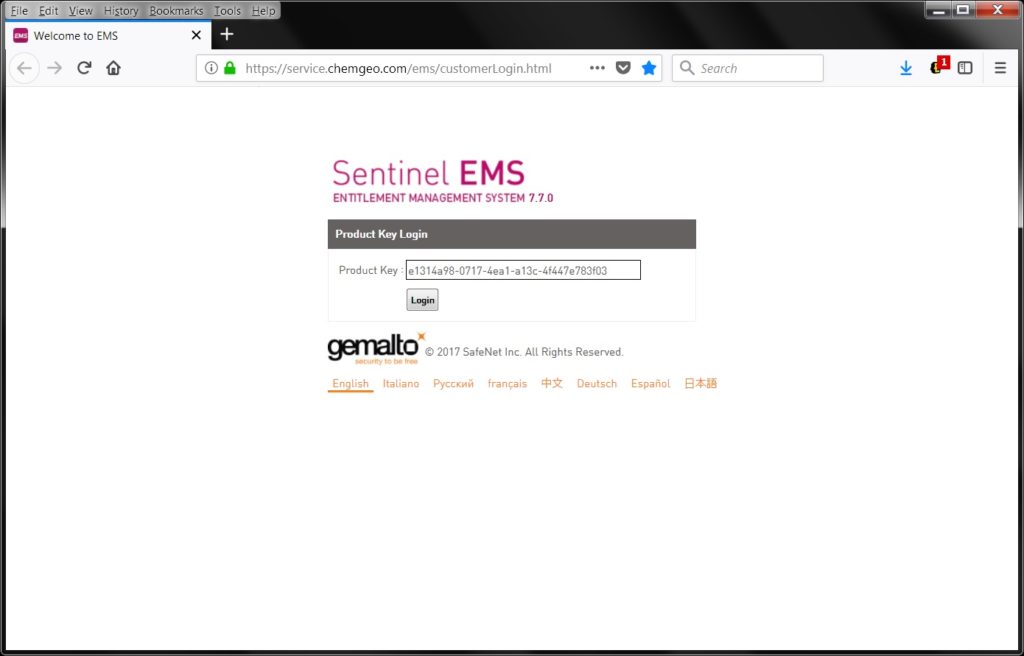
https://service.chemgeo.com/ems/customerLogin.html
The following screen is displayed:
Paste your product key in the box and click Login.
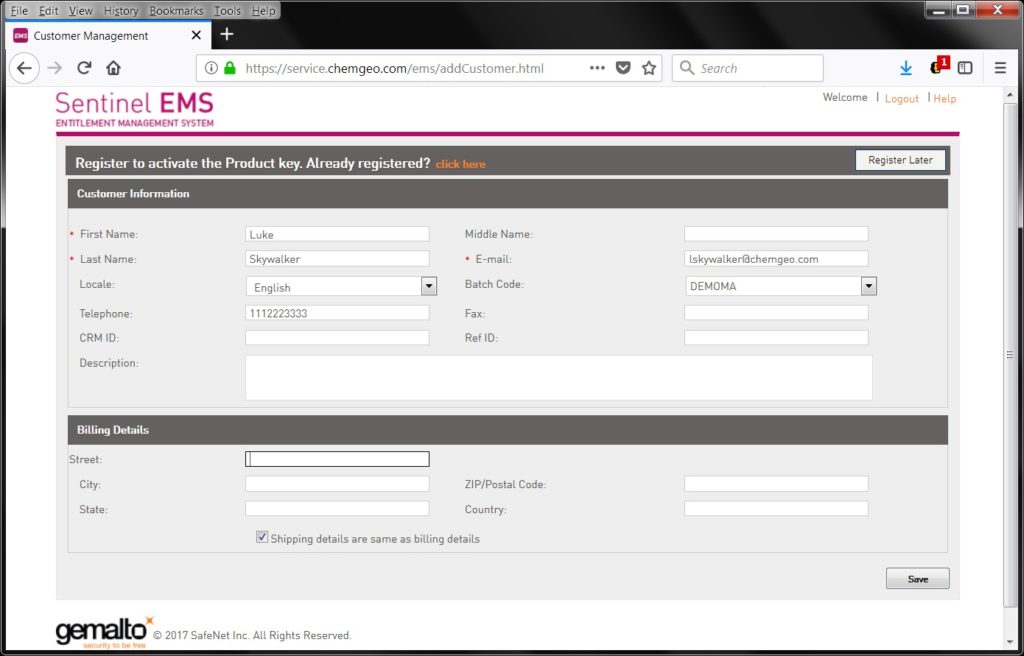
The following screen is displayed:
3. Fill in the contact information for improved customer service and technical support. Click Save to continue.
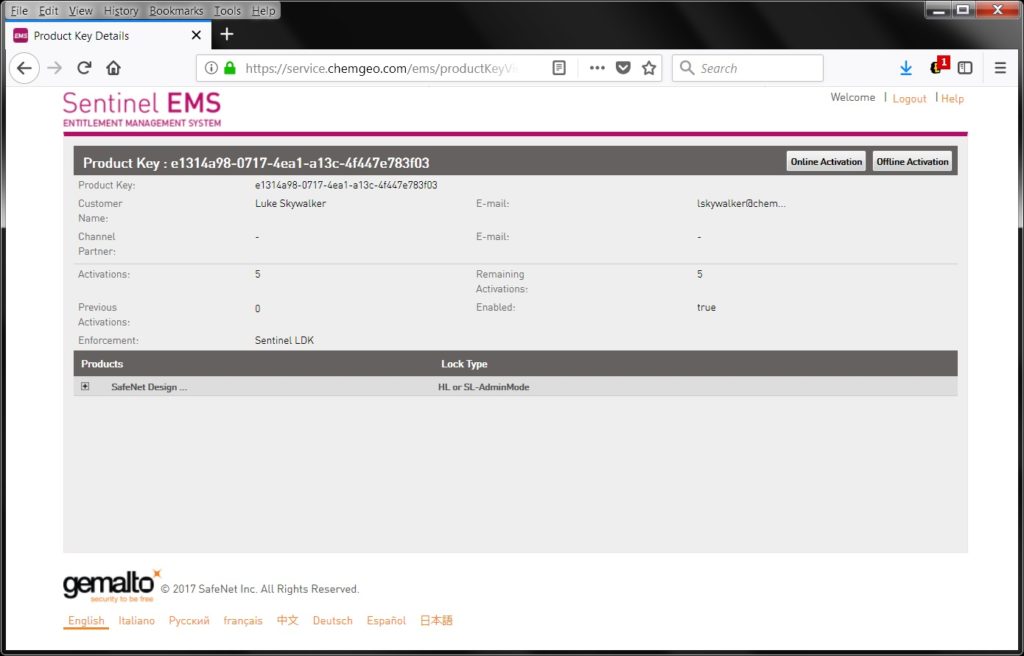
The following screen is displayed:
4. Confirm that activation is available when the Remaining Activations number is positive. Click Online Activation to initiate the fully automatic activation. If successful, a message in green will show shortly at the top of the page to confirm that license is installed.
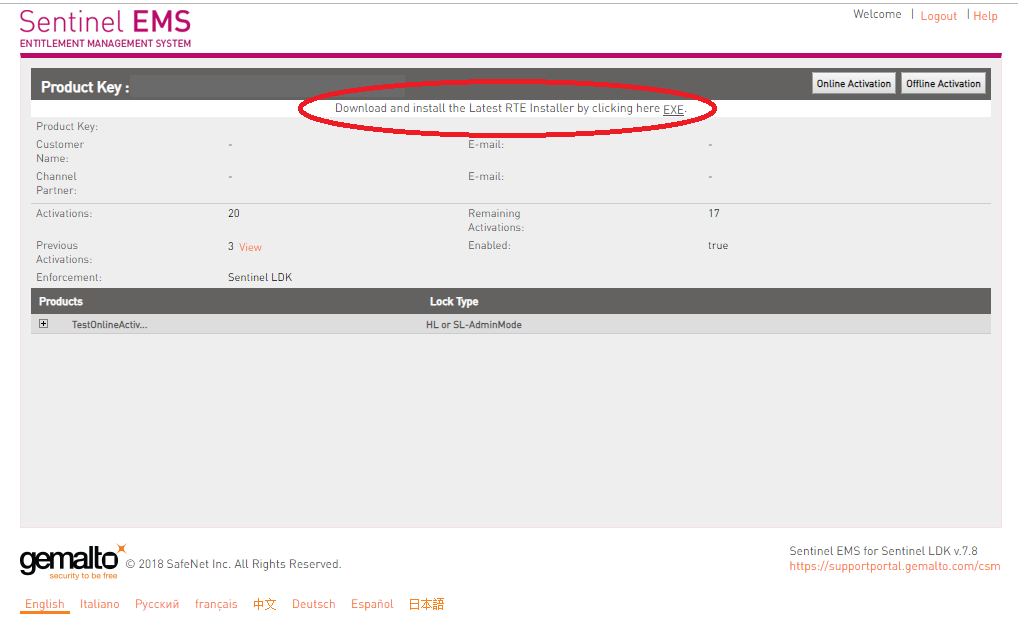
5. If the message reads, ‘Download and install the latest RTE Installer by clicking here EXE’, it indicates the online activation failed. Do NOT download and install the RTE Installer following the link. The online activation is sometimes blocked by the firewall on the target computer. Follow the instructions in Part 2 for Offline Activation or contact our technical support team for assistance.
Part 2: Offline Activation
When the internet connection is not available on the target machine, or the online activation is unsuccessful, offline activation is offered for the license activation. Skip this part if the license is already activated by online activation.
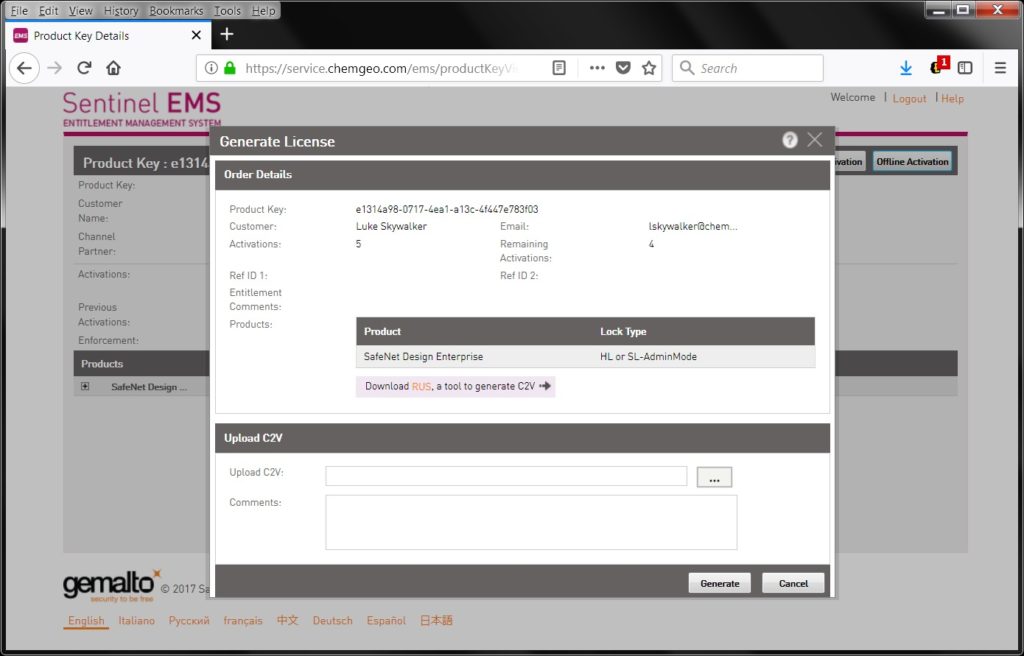
1. Use a computer with access to internet to reach the product details page, by steps 1 to 3 in Part 1. On the product details page, click Offline Activation.
The following screen is displayed:
2. Launch the Remote Update System (RUS) utility, which is installed with IsoBox, on the target machine through the Windows Start menu (Programs > ChemGeo > IsoBox).
The following screen is displayed:
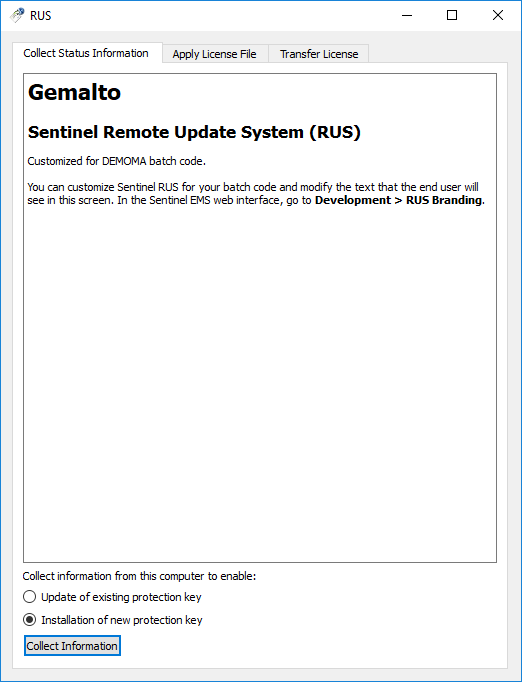
3. For new installation, select Installation of new protection key on the RUS window. Click Collect Information button, then select the location on the disk to create the .c2v file, which is merely a fingerprint of the hardware configuration used to identify the machine.
4. Copy the .c2v file back to the computer logged in to the EMS customer portal, click the […] button next to the Upload C2V box, select the .c2v file, then click Generate button.
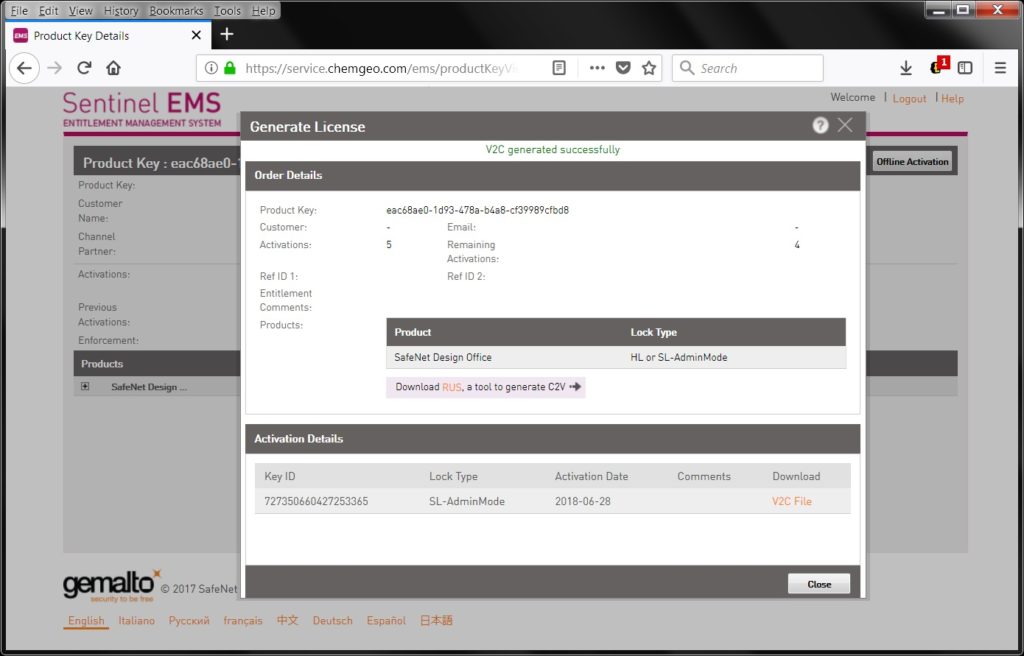
If successful, the following screen is displayed:
The bottom part the page will show a link to V2C File. Click the link to download the .v2c file.
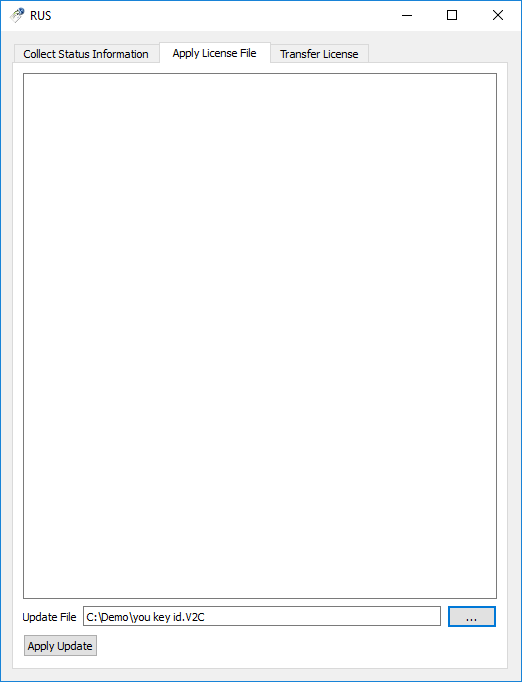
6. Copy the downloaded .v2c file to the target machine. On the RUS utility window on the target machine, switch to the Apply License File tab.
The following screen is displayed:
Click the […] button next to the Update File box, select the downloaded .v2c file. Click Apply Update button to finish the activation.
Part 3: Verification of Activated Licenses
1. Close and restart IsoBox.
2. Access the About IsoBox dialog through Help > About IsoBox menu. Active licenses are listed on the right. Scroll down the list if necessary, and confirm the licenses activated for the purchased modules and the expiration dates.
